Last week we learned how to use filters in my Photoshop class.
And not the lame-o filers like "make-your-photo-look-like-a-painting filter".
The coolest filters are the liquify and lens correction filters. The liquify filter is probably my favorite because it's the one that makes you SKINNIER.
Here is my "Photoshopped" image:
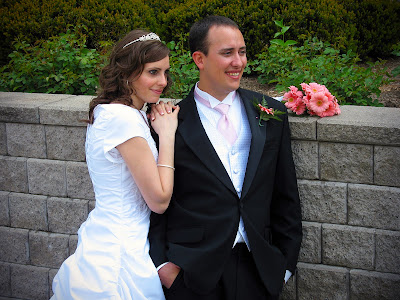
Hopefully it doesn't look too Photoshopped. As my teacher says, subtlety is key.
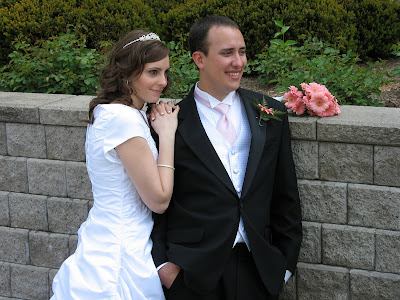
Here's the original:
 Now I'll take you through my transformation.
First I wanted to make my arm skinnier, then I went for my tummy.
My teacher said I made my eyes too big, but you can't blame a girl for trying.
I made Tom's eyes a little bigger too.
Then I used the lens correction tool to add a vignette.
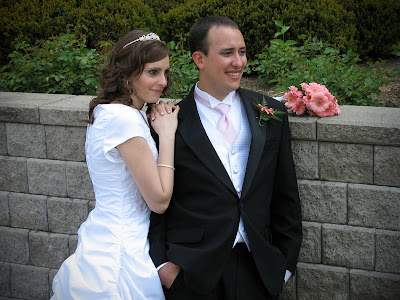 Next, I adjusted the color. I mostly just upped the saturation to bring out the skin tones and bright colors.
 Third, I took out some blemishes that were bothering me. Like red spots on my arms and face. I also minimized the bags under our eyes.
(I don't know about Tom, but I didn't sleep very well the night before our wedding...)
 Lastly, I used the High Pass filter to sharpen the image. This is something my teacher says you HAVE TO DO to every picture you Photoshop. It will make any picture you print much better.
It's hard to see a difference unless you're looking very closely at the details.
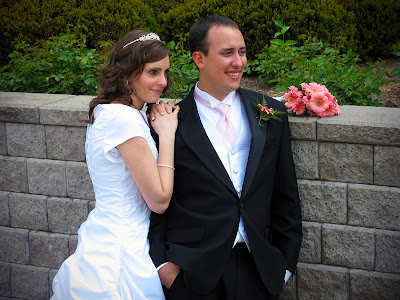
Here's the final image again.
I may have to print another wedding picture...4 years after our wedding!
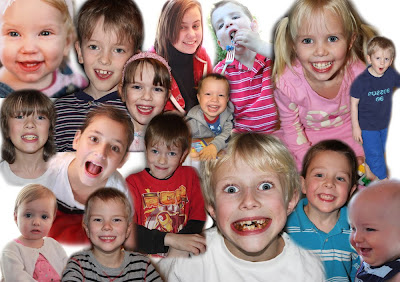
Our second Photoshop assignment was to make a collage using layers and layer masks.
I made a collage of some of my nieces and nephews (on Tom's side). It was just a quick homework assignment so I didn't have time to gather pictures of all my nieces and nephews. I may have to add more later. (We have 46 nieces and nephews in total with 5 more on the way!)
 If you'd like more information on the Photoshop class or any of Jed's Photography classes, go to his website or find him HERE on Facebook.
And not the lame-o filers like "make-your-photo-look-like-a-painting filter".
The coolest filters are the liquify and lens correction filters. The liquify filter is probably my favorite because it's the one that makes you SKINNIER.
Here is my "Photoshopped" image:

Hopefully it doesn't look too Photoshopped. As my teacher says, subtlety is key.
Here's the original:
 Now I'll take you through my transformation.
First I wanted to make my arm skinnier, then I went for my tummy.
My teacher said I made my eyes too big, but you can't blame a girl for trying.
I made Tom's eyes a little bigger too.
Then I used the lens correction tool to add a vignette.
 Next, I adjusted the color. I mostly just upped the saturation to bring out the skin tones and bright colors.
 Third, I took out some blemishes that were bothering me. Like red spots on my arms and face. I also minimized the bags under our eyes.
(I don't know about Tom, but I didn't sleep very well the night before our wedding...)
 Lastly, I used the High Pass filter to sharpen the image. This is something my teacher says you HAVE TO DO to every picture you Photoshop. It will make any picture you print much better.
It's hard to see a difference unless you're looking very closely at the details.
Here's the final image again.
I may have to print another wedding picture...4 years after our wedding!Our second Photoshop assignment was to make a collage using layers and layer masks.
I made a collage of some of my nieces and nephews (on Tom's side). It was just a quick homework assignment so I didn't have time to gather pictures of all my nieces and nephews. I may have to add more later. (We have 46 nieces and nephews in total with 5 more on the way!)
 If you'd like more information on the Photoshop class or any of Jed's Photography classes, go to his website or find him HERE on Facebook.
No comments:
Post a Comment