Tuesday, November 27, 2012

Thanksgiving Dinner for Two


On Wednesday (the day before Thanksgiving) Tom and I found ourselves scrambling to put together a Thanksgiving dinner. Usually we will just mooch off of one of his five siblings who live in Utah, but all of them were either out of town or eating with in-laws.

Now let me stop you before you say "Oh, you should have come to my house for Thanksgiving, we would have loved to have you!"
Thank you, that is very sweet.  We did get some offers, but decided we liked the idea of an intimate Thanksgiving at home.
After a quick trip to Macey's, we had everything we needed.  

P.S.  This is a perfect great example of why Macey's is my favorite grocery store.


Here are some shortcuts I took to make my Thanksgiving for two even easier*.
(*Easy is relative.  I mean, we are talking Thanksgiving here.)

No turkeys here!  I still wanted to stuff something so I bought a couple cornish hens.  They're soooooo cute and small!  (And then I realized they're 5-week-old chickens and felt guilty for a few minutes, but I got over it.)
Buy bagged salad! Normally I'm too cheap to pay twice the price for half the amount of salad, but on Thanksgiving, it's totally worth it.
Store-bought pie! I used to fight for the right to bake my mom's famous pies.  But guess what, I was the only one who cared if they were homemade or not.  Plus, Tom wanted pecan pie and that's not in my repertoire.

The hens ready to get their tan on.


The final result!  This may be a Thanksgiving for two, but I still made way too much food.  But that's okay.  What's Thanksgiving without leftovers?

We finished our Thanksgiving Day with a two-player board game appropriately named "Gobblet"!  Tom and I are kinda obsessed with this game right now.  Alright, I'm the one obsessed with it because it's the only game I can BEAT Tom at!


It's kinda like tic tac toe, but with 4x4 squares instead on 3x3.  And you get to gobble each other's pieces.  You should try it.  It's super fun!

Thursday, November 22, 2012

Thanksgiving "Corn" Marshmallow Treats

This past weekend the hubby and I had the great privilege of babysitting my niece and two nephews while their parents were out of town.

I was in charge of coming up with an amazing activity to keep them occupied, and since I work for Studio 5 now, that was pretty easy.


The idea for the "corn" marshmallow treats comes straight from a Studio 5 segment you can watch here.  This was just one of 10 ideas for edible Thanksgiving favors.

Here's what you need:
Kix Cereal
Marshmallows
Butter
M&Ms
Corn Husks (found in the Mexican food aisle at the grocery store)
Popsicle Sticks (or another candy stick)
Twist Ties (or you can tear pieces of the corn husks and use those as ties)

Use your favorite Rice Krispie Treats recipe (I used the one on the Kellogg's website and doubled it) and replace the Rice Krispies with Kix. Above, my niece Gemma is helping me pour the cereal into my giant stainless steel bowl from IKEA.  The boys were too busy playing with G.I. Joes to help right away, but that didn't last long.

Sanitation was not the number one priority in this project.  Here's Gemma eating a few Kix right out of the bowl.  A theme you'll continue to see throughout this post.


While I was getting the rest of the supplies ready, Gemma got to work on probably the best part of the project.  Separating the M&M colors.  You only want to use orange, brown, red, and yellow M&Ms.  All the rest are up for eating.  That's when my nephew Sawyer decided he wanted to be part of out little activity too.

Sidenote: Yes, I put makeup on my niece.  It's the glitter eyeshadow from Eye Kandy, and it's AMAZING!  I'm currently obsessed.


Here's Gemma helping me melt the marshmallows and butter.  She ate the marshmallows, I stirred the mixture.  Again, not very sanitary.

One lesson I learned in all this: don't use big marshmallows for Rice Krispie Treats.  They take FOREVER to melt.

One thing I love about Gemma is how excited she gets about EVERYTHING!  For example, her reflection in my big pot.  We couldn't move forward with our treat until we made a million funny faces!

Then it was time to add the marshmallow to the Kix.  This was when Milo finally decided to join us.

I tried to wait a while before adding the M&Ms, but I probably didn't wait long enough.  They got a bit soft while we were molding the treats.

Speaking of which, molding the treats is the next step.


Make sure you have the popsicle sticks ready, plus you want to start soaking the cork husks.  They need to sit in water for a few minutes so you can mold them.

Then it's time to get messy!!

Mold the marshmallow treats into the shape of corn on the cob. Leave out at least an inch of the stick.
Place the finished treat on the corn husk and use the twist tie to secure it to the popsicle stick.
That's it!  You're done.  Pretty easy, eh?

We were all very proud of our work!

Milo shows off the chewy goodness.

Sawyer was so funny.  He was so proud of his corn, he held it like a new baby!

Here are the finished masterpieces!


Monday, February 13, 2012

The Star Wars Party for Adults!

If you know Tom, you know he's a Star Wars nerd.
Not the trivia-quoting kind, but the kind who names his dog "Yoda", cuz it's cool.

But a few weeks ago one of our nephews called him out because he doesn't actually own ANY of the Star Wars movies.
That is, until yesterday.
Tom asked for all the Star Wars Blu-rays for his birthday.
But I couldn't just give him the movies, I had to give him the whole Star Wars experience.


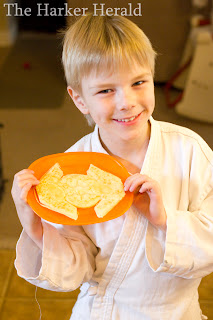
It started at breakfast with Star Wars pancakes with our nephews!
The pancakes molds (from Williams-Sonoma) was one of Tom's birthday presents.


Then it was time to get started on the cake for Tom's Star Wars birthday party.


I started with six round cakes (three box cakes with a few secret ingredients.)
I found a copycat recipe for the cream cheese cake filling Costco uses.
It is so ridiculously good, it was probably my favorite part of the cake.
You can find the recipe here (I used white chocolate pudding mix instead of vanilla.) 


Then I started trimming.  Can you tell yet who I was trying to sculpt?
  

Then, I iced the head and used a color spray to make it grey.  (It was actually black color mist, but it turned out looking grey, which is what I was hoping for.)


Then I iced the rest of the body with white icing.


After a few blue and black accents... Voila!  Tom's R2D2 cake!

Time to party!


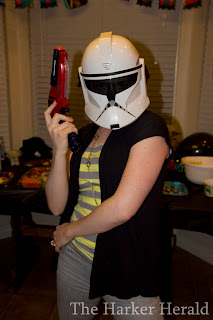
That's me and Tom as a Storm Trooper and Darth Vader.


Ash and Aaron came as people from the planet Hoth.


I don't need to tell you who they are, right?


This is Tom's friend Dan.  He's probably the biggest Star Wars nerd on the planet.  Having him there totally MADE the party! (He knew the answers to all the Star Wars trivia when no one else had a clue.)


We played Star Wars charades.  Here Ashley is pretending to be Jabba the Hut.  Her team got it in seconds!
We also played Star Wars Trivia with questions from this website.
I learned a ton of interesting (and useless) facts about Star Wars.
Like, did you know George Lucas considered making Luke Skywalker a midget?
We also played a game with Star Wars movie quotes, where people had to guess who said the line (but I can't find the website it came from right now.)


Here's Tom blowing out his candle.


Ashley as Darth Vader.


My other friend Ashley as a Storm Trooper.


And here's Tom again.  My sexy birthday boy!
Happy Birthday baby!  You may be OLD, but you're obviously still 14 at heart.
That makes me a hot cougar right?  RIGHT?

Sunday, January 1, 2012

The New Polaroid

For my 27th birthday last month I got a new camera!
Not a new SLR.  Not a new digital camera.
A film camera!


As you can see, it's not just any film camera.
It's an INSTAX camera.
Instax, by Fujifilm, is the new Polaroid.
You take a picture, and voila, it pops out of the top of the camera.


When I told my hubby this is what I wanted for my birthday, he didn't even know what it was.
I first saw them on Studio 5 because these cameras are really hot with scrapbookers.
And while I'm not exactly a scrapbooker, I figured I could find more than enough ways to use this camera.


Even though Tom had never heard of this camera before, he outdid himself by finding me a PINK ONE!
I didn't even know they MADE pink ones!


I got to try it out on my nephew during my birthday dinner at Outback steakhouse.


I forget that kids these days have never seen or heard of Polaroid pictures.
So sad.
But to see my nephew's face light up as he watched the image slowly appear in the picture?
PRICELESS!
Just another reason they think I'm the COOLEST AUNT EVER!
(That, and I'm married to Crazy Uncle Tom.)

Happy birthday to me!

Thursday, November 10, 2011

DIY Fascinators


I recently went home to Ottawa, Ontario for my sister's wedding.
And for her bridal shower, we went to "High Tea" at the Chateau Laurier, one of the fanciest hotels in Canada's capitol city. (Like the Grand America in SLC.)

To prepare for the British tradition, I went to Hobby Lobby and bought $100 worth of supplies to make our own fascinators!
(They don't have Hobby Lobby in Canada so I actually bought all the supplies in Utah and shoved them in my suitcase for the trip.

 This is two of my sisters and my sister-in-law the night before the shower making fascinators on my mother's fancy dining room table.
At one point there must have been a dozen of us around that table sharing glue guns, lace and fighting for feathers!

I don't care how good my nephew, Jake, looks in a fascinator, there were no boys allowed!!

Here are all the fascinators sitting on my mom's grand piano.
 
 Like I said. Lots of feathers.

My niece Carolyn and my sister Tracy getting ready right before the Shower.

My sister Sheri and my niece Jennifer getting ready.

And here's me all ready for the ball with my home-made fascinator!
I couldn't resist putting these pictures in because you can see all the decor in my old bedroom is still there!
Spice Girls Poster, Moulin Rouge stuff, and the blond is Hilary Duff.

Think this is a messy room?  You should have seen it when I actually lived there!

My sister Tracy getting snapped by the Paparazzi (me).

Five of my nieces and my sister, Victoria, in the middle.

Now here's the fun part.  Close ups of all the fascinators.
My sister-in-law Andrea wins the prize for looking the most British!
Her fascinator definitely doesn't look home-made!

Jennifer's fascinators was one of my favorites because it was PINK!
And I LOVE the veil.

My sister Sheri wins the tallest fascinator award!

My sister Catherine wins the award for putting the most work into her fascinator.
She crocheted the flowers and beaded it herself.
Sure, it may not be a real "fascinator" by definition, but it's gorgeous!

Full disclosure. We did not make my niece Christina's fascinator.  It was the one I bought for $5 at Claire's to celebrate William and Kate's wedding. (Click here to see that blog post.)
I brought it as an extra fascinator for whomever wanted to wear and as inspiration for our home-made creations.
This is one of my favorite pictures ever of Christina.  She looks like a princess!

My niece Julie wins for most colorful fascinator!

Momma Strang rocks the feathers!

You'd think the blushing bride would make a white fascinator, but not Victoria.  She need BLACK to go with her sexy back dress.

Here's my home-made fascinator!  I wanted something BIG with lots of feathers!

My sister Tracy with her blue fascinator again.  I love this photo because it's one of the few I got of someone actually drinking tea at the tea party!

My niece Anngela made a fascinator that was also in the running for tallest fascinator, but her mom, Sheri, already won that title.
Instead, Anngela wins for BEST FASCINATOR.  Hers was my absolute favorite.  I liked it even better than my own!  I'm just a sucker for the mini top hat and the feathers.  (You can find them at Hobby Lobby in the doll section.)


Here are all the girls in our fascinators at the tea party.  People were starting at us the entire time.  They were so jealous!
Oh man, how did this picture get in there?! These are the shoes I bought especially for the bridal shower.
So hot!

Feel free to any questions about how we made our fascinators in the comments.